This is an automatically translated article.
The article is written by Master - Doctor Nguyen Ngoc Phu - Emergency Medicine Doctor - Intensive Care Department - Vinmec Times City International Hospital.
Minimal pleurodesis is a procedure that places a flexible, thin, sterile plastic tube into the pleural space (the area between the lungs and the chest wall) connected to a closed system to aspirate air or fluid from the cavity. pleura.
1. Purpose of minimal pleural effusion
Restore negative pressure in the pleural space to help the lungs expand and contract normally Prevent hemodynamic disorders when there is pneumothorax, pressure hemothorax Treat and monitor in purulent, hemothorax pleura .
2. When is pleurectomy indicated?
Minimal thoracocentesis may be indicated for the following cases:
2.1 Pneumothorax
Spontaneous pneumothorax mediastinum Pneumothorax due to air leak after pneumonectomy Postoperative bronchial fistula or mechanical ventilation.
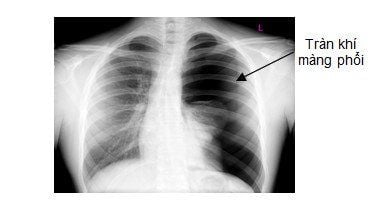
Bệnh nhân tràn khí màng phổi được chỉ định mở màng phổi
2.2 Hemothorax
Chest trauma After thoracic or upper abdominal surgery Cardiovascular or aortic disease (myocardial infarction, acute thoracic aortic dissection, thoracic aortic trauma).
2.3 Pleural effusion
Sterile effusion Infectious effusion (inflammatory fluid, empyema pleural effusion) Malignant effusion Chilli chorioretinal perforation Esophageal leak of gastric juice - air into the pleural space.
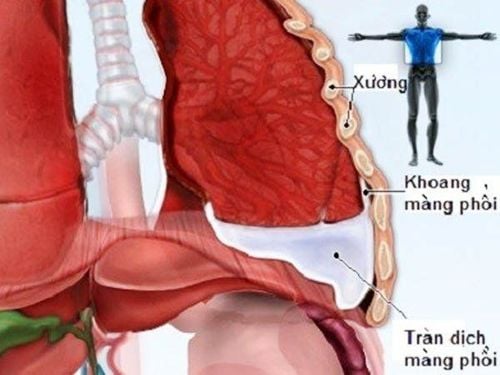
Tràn dịch màng phổi được chỉ định mở màng phổi
2.4 Chemical pleural adhesions
Recurrent pneumothorax Multiple pleural effusion, rapidly relapsing due to malignancy.
3. Contraindications to pleural effusion
There are no absolute contraindications for pleural effusion, except in cases where the patient has a pathology that causes the lung to adhere completely to the chest wall, and the pleura is heavily septal. Relative contraindications in the following cases: Patients at risk of bleeding due to coagulopathy, are taking anticoagulants. In these cases, the procedure can be performed when enough coagulation factors and platelets have been transfused to ensure that the risk of bleeding is low or higher (platelets > 60 G/L and APTT disease/control < 1.5).

Bệnh nhân rối loạn đông máu chống chỉ định thực hiện phương pháp này
4. Preparing to perform a pleurodesis
4.1 The person performing the procedure
01 doctor is well-trained in technique, 01 skilled nurse helps the doctor to open the pleura.
4.2 Patients
Explain the procedure to the patient or the patient's family. In an emergency situation may not be able to explain in time. Place the patient in the supine position with the head elevated, the side performing the procedure is placed under the patient's head, so that the safe triangle area is clearly exposed
The location of the drainage opening is the safety triangle: The anterior border is the pectoral muscle large, posterior border is broad dorsal muscle, lower border is intercostal space 5.
4.3 Means, tools
A pleural dialysis kit with all necessary tools is packed in a sterile box, including the following tools: 01 scalpel and handle of size 11, some surgical tools: Pinch, surgical forceps, In particular, there must be 1 Pinch of obtuse to dissect the muscle layers of the pleural space. 01 sterile towel with hole 10cm in diameter. 01 10ml cylinder and 01 20ml cylinder. Anesthesia, non-stick silicone drainage tube due to blood clot formation has the size indicated for drainage. Continuous negative pressure closed suction system
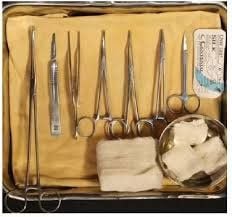
Bộ dụng cụ mở màng phổi
4.4 Medical records
Check the patient's medical records, the signed agreement to perform the procedure of the patient, the patient's family, the record of the procedure monitoring.
5. Steps to open the pleura
5.1 Checking the medical record
Check the patient's medical records, written consent to perform the procedure of the patient, the patient's family, and the procedure monitoring note.
5.2 Re-examine the patient
Re-evaluate the patient's vital functions whether it is safe to perform the procedure.
5.3 Technical implementation
Wash hands, wear gloves. Disinfect the drainage site with Betadin, alcohol. Sterile towels.
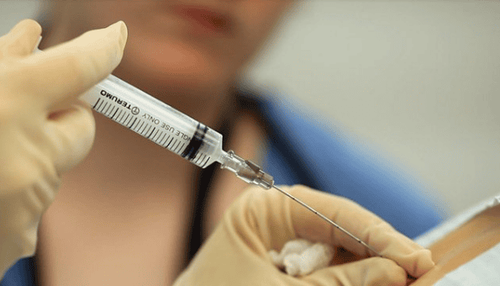
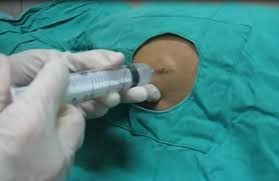
Bác sĩ tiến hành gây tê từng lớp cho người bệnh
Anesthesia layer by layer. Using a scalpel, make an incision across the 5 middle axillary ribs, 1.5 to 2 cm in length, through the skin to the muscle layer. Using a curved Pinch with a blunt end (Kelly) dissects each layer of muscle in the direction from the transverse rib to the intercostal space and deep into the pleural space. When reaching the pleural cavity, there will be a feeling of "Hung" in the hand and there is gas or fluid out. Using the finger of one hand, put the pleural cavity into the pleural cavity to probe and check the drainage has entered the pleural space. At the same time, it is possible to dissect a part of the pleural space if there is adhesion at the drainage site. After entering the pleural space, proceed to insert the drainage tube: Use a curved Pinke to clamp the tip of the drain tube along the upper opening line, when entering the pleural space, there will be fluid or air through the drainage tube. If air is vented, point the tip of the tube upwards. If draining, make the tip of the tube point downward. Fixing the drain pipe. Connect the drain hose to the continuous suction system. Check the location of the drain Take a chest X-ray to check the drain.
6. What are the possible complications and complications?
Bleeding that is difficult to stop at the drainage site: Related to coagulopathy, or during drainage opening with perforation of the blood vessel. The procedure is brutal to damage the internal organs of the chest: Heart, lungs, blood vessels even cause damage to the liver and spleen in the case of poor positioning. Injury to major blood vessels: aorta, intercostal artery, subcutaneous emphysema. Due to the phenomenon of recirculation when removing pleural fluid too quickly, it causes acute pulmonary edema. Infection at the drainage site, empyema. Drainage blockage due to blood clot or incorrect placement of drain tip.
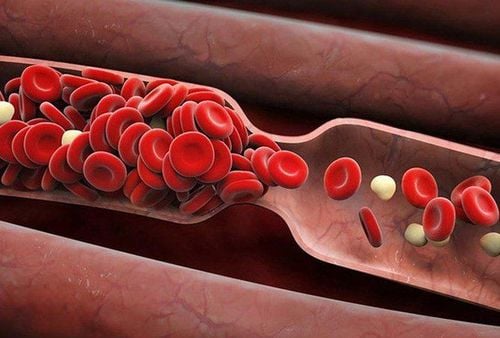
Người bệnh mở màng phổi có thể tắc ống dẫn lưu do cục máu đông
7. When to withdraw pleural drainage?
7.1 Selection of withdrawal time
If air drainage: After 12-24 hours, take a chest X-ray without pneumothorax. If pleural drainage is drained: When pleural fluid is left <200ml/24h, the patient's condition improves, chest X-ray is completely expanded. In the case of hemothorax or thickening of the pleura, if after pleural drainage the condition does not improve, extensive pleurodesis may be considered for pleural dissection.
7.2 Drainage technique
Withdraw the drain at the time when the patient is maximally inspiring at the end of inspiration and beginning of exhalation. This avoids pain to the patient and avoids the return of air through the drainage hole.
Please dial HOTLINE for more information or register for an appointment HERE. Download MyVinmec app to make appointments faster and to manage your bookings easily.
SEE MORE
Emergency pleurisy technique Minimal drainage of the pleural cavity Placing a pleural drain in a breathing patient
