This is an automatically translated article.
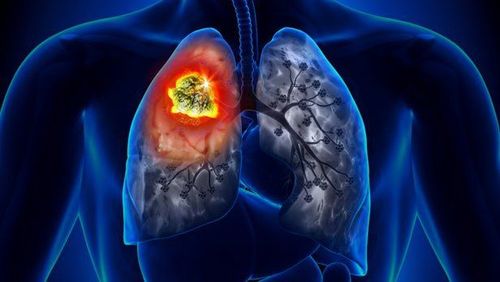
In some diseases related to lung lesions, especially lung tumors, taking samples has an important role in determining the nature of the lesion and the type of lesion. Since then, thoracotomy for exploration and transthoracic biopsy were born, which has achieved remarkable success in diagnostic work.
1.Overview of exploratory thoracotomy and biopsy
In lung cancer, in order to determine the stage of the disease in order to provide appropriate treatment when there is no clear diagnosis, it is necessary to open the chest with biopsy for diagnosis. Doctors will appoint exploratory thoracotomy, lung biopsy in the following cases:
Small peripheral lung tumor with many air bubbles without indication for needle biopsy Want to evaluate ipsilateral lung metastasis and lymph node metastasis mediastinum in the absence of thoracoscopy, or contraindications to thoracoscopy. Contraindications for exploratory thoracotomy and biopsy are:
Contraindications to anesthesia Patients with low lung function VC<90 Patients with stage IIIB- stage IV disease
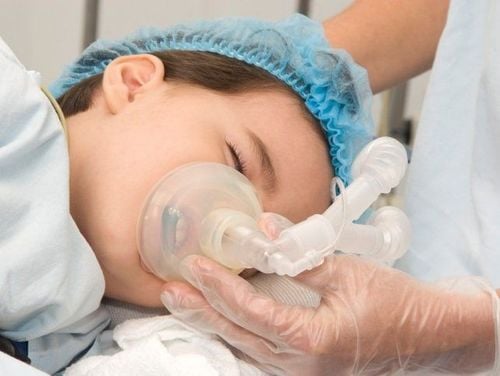
Khi thực hiện mở ngực thăm dò, sinh thiết chống chỉ định của gây mê
2. Steps to conduct open chest surgery, biopsy
Step 1: anesthesia phase
Endotracheal anaesthesia with Carlens tube Use of 2-3 intravenous lines both peripheral and central Step 2: Patient positions and thoracotomy can be used:
The patient lies on the side 90 degrees to the opposite side of the lesion, using a horizontal pillow below the chest in the intercostal space V.
There are 5 chest openings for exploration, biopsy can be used including:
Posterior thoracotomy : the opening goes directly into the hilar area and the aortic arch. The disadvantage is that you have to cut many muscles because it crosses two planes. Anterior lateral thoracotomy: is a cosmetic opening because the skin incision is below the breast. Lateral thoracotomy: is an opening with the advantage of reducing pain and obstructing breathing after surgery, limiting infection and having a small surgical field. The reason is because the anatomical characteristics of the lateral thoracic region have very little muscle, the shallow plane has large back muscles in the back, just pulling it out is enough, the deep plane has large tooth muscles with fibers parallel to the intercostal space. so it can also be separated. Posterior thoracotomy: Rarely used because of the need for major muscle resection, but allows direct access to the tracheobronchial tree fork. The 5th costochondrectomy is a very small opening of the chest, aiming to enter the pericardium just behind the costal cartilages on the left breastbone. The open path is used for the investigation of suspected cardiac trauma-injury that is clinically unknown, without echocardiography.
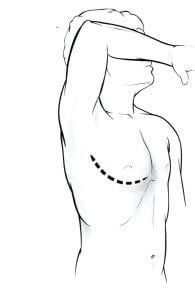
Đường mở ngực trước bên có độ thẩm mỹ cao nhất
Step 3: Exploratory phase:
First evaluate the location, size of the tumor, biopsy to diagnose the tumor if no pathology is available. Ventricular and hilar lungs, biopsy of lymph nodes for staging Diagnosis of surgical feasibility Place a closed drain on the intercostal space 7-8 anterior axillary lines in the lateral vertebral sulcus and aspirate pressure – 20 mmH2O Step 4: Monitor and manage complications:
Closely monitor vitals Monitor blood flow: need to drain when red discharge is greater than 200 ml/h in the first 2-3 hours, need to stay to stop bleeding. Chest X-ray to check after surgery and after 24 hours Instruct family and patients to flap - practice breathing early, nebulizing immediately after extubation
3. When is a transthoracic lung biopsy indicated?
Indications for transthoracic lung biopsy include:
Hilar lung tumor or mediastinal tumor Newly detected lung tumor or solitary lung nodule, growing during follow-up on X-ray without diagnosis diagnosed after flexible bronchoscopy Lung tumor or solitary pulmonary nodule on lung CT shows little likelihood of follow-up injury by flexible bronchoscopy Sees multiple lung nodules without definitive diagnosis

Bệnh nhân u phổi được chỉ định thực hiện
4. Stages of transthoracic biopsy
Patient preparation phase:
Explain to the patient the purpose of the procedure and ask for cooperation Inject 2 ampoules of atropine 0.25 mg subcutaneously 15 minutes before the procedure. Needle puncture:
Put the patient on the table and expose the entire chest. Patient position is prone, supine or inclined depending on the location of the lesion Based on CT scanner to determine the lesion in terms of location, size and calculation. Substance Take 1 more Topogram film Bring the line marking the cut to the lesion site Turn on the guide light, bring the red light line to the upper border of the lesion on the chest wall Stick the needle on the line and take a CT scan of the area of the foil needle Select the cut layer for biopsy Determine the distance from the skin to the outer edge of the lesion Determine the angle made by the line perpendicular to the table surface and the expected entry line Mark the position of the entry point on the skin The stage of the cut:
Disinfect the area to be punctured with alcohol, spread a sterile hole on the chest to expose the biopsy area Place the set screw on the guide needle in the star position for the distance from the tip of the heart to the screw positioned exactly as the distance from the skin edge to the outer edge of the lesion Anesthetize the skin to the pleural wall with xylocaine 2% Use a knife to open an incision to facilitate the entry of the guide needle Then, conduct a percutaneous guide needle puncture at the marked position, the needle goes close to the upper edge of the rib in the direction of creation with a line perpendicular to the angle table measured above. The patient holds his breath and then inserts the needle through the visceral membrane. lung into the lesion, the needle goes deep enough to stabilize the position on the skin surface Check the film of the needle tip has entered the lesion correctly, the direction of the needle is correct, and then adjust The case of the needle guide is correct position, withdraw the barrel of the guide needle and immediately insert the prepared cutting needle into the barrel of the guide needle and conduct a cut to take the specimen. After withdrawing the biopsy needle, immediately insert the barrel of the guide needle Place the specimen in the prepared formol vial. Biopsies follow the same sequence as above with other specimens until the required number of fragments is obtained. breathe and then quickly withdraw the guide needle still attached to the 20ml syringe from the chest wall Antiseptic and bandage the puncture site Stage of monitoring and dealing with complications:
CT scan to evaluate complications such as parenchymal bleeding tissue, pleural bleeding, pneumothorax Take a chest x-ray after 24 hours to further evaluate for complications of pneumothorax that appear late after biopsy. Outpatients should be kept under observation for at least 4 hours.
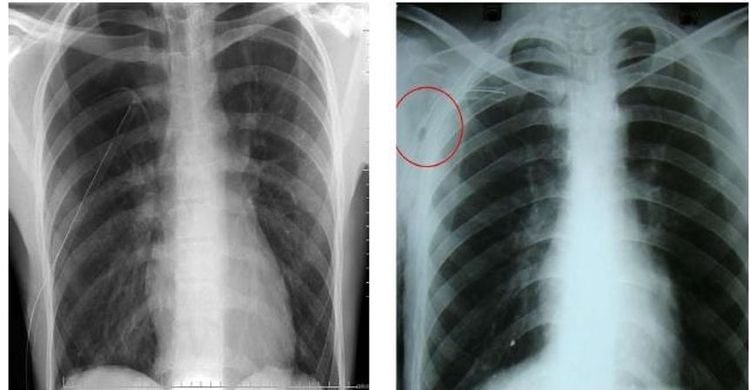
Sau sinh thiết xuyên thành ngực, cần chụp X-quang để phát hiện các biến chứng
To screen and detect lung cancer early, you can refer to the Lung Cancer Screening Package deployed by Vinmec International General Hospital. When registering for the Examination Package, customers will receive:
Examination and consultation with an oncologist. Lung cancer screening through low-dose CT Scanner for lung tumor screening. For detailed medical advice, please go to Vinmec health system directly or register online HERE.
