This is an automatically translated article.
Advised by: Master. Doctor Duong The Vinh, Head of Rehabilitation Department, Vinmec Times City International General Hospital.In Vietnam, every year, 10-20% of patients come for examination and treatment at rehabilitation facilities for wrist shoulder syndrome. Cervical spondylosis patients account for 14% of all spondylolisthesis patients. Along with other treatment methods, physical therapy and mobility training in which Neck and Shoulder Mobility Exercise is one of the most effective measures to treat pain, restore movement function. and prevent pain recurrence.
Neck - Shoulder - Hand syndrome is very common due to many different causes, mainly manifested as pain in the cervical spine and shoulder joints, limited movement of the neck and shoulder joints in all positions. A herniated disc in the cervical spine can cause muscle atrophy, limitation or loss of motor function in the hands. Wrist syndrome can occur at any age but is more common in middle age and the elderly. Cervical spondylosis is one of the common causes of wrist shoulder syndrome.
The following is a specific guide to exercises to mobilize the cervical spine and shoulder joints.
1.Preparation Pose
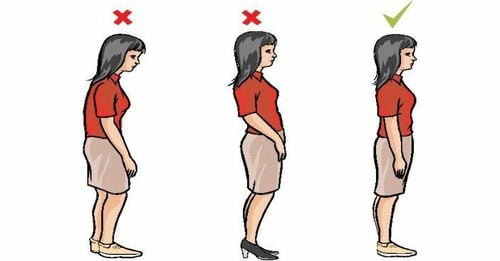
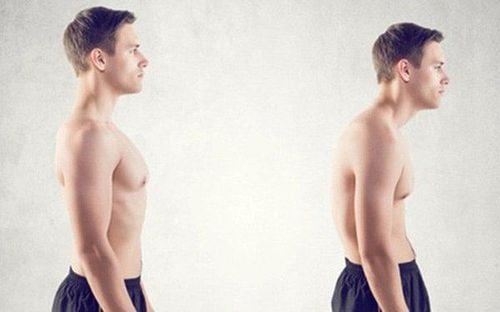
The practitioner sits relaxed (relaxed) on a chair of suitable height so that the feet are close to the floor, ankle joints, knee joints, hip joints on both sides are perpendicular, torso is straight, head and neck are straight, two Shoulders are equal, arms are stretched along the body, weight is evenly distributed on both buttocks and legs.Put in front of a mirror that can see the whole body or from the waist up so that you can check the movements yourself. The practice place needs to be airy, light, and quiet so that the practitioner is not distracted while performing the exercises.
2. Flexion and extension of the cervical spine
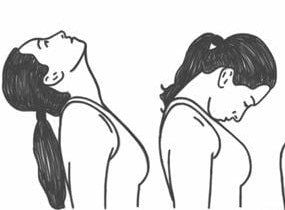
Note: Only practice flexion and extension of the cervical spine, while keeping the body in a comfortable, upright sitting position as described above in the preparation position.
3. Tilt the cervical spine to the right and left
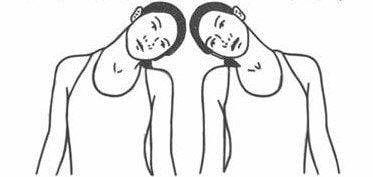
Note: Only practice tilting the cervical spine, while the body remains in an upright, comfortable sitting position as described above in the pose prepare.
4. Turn the cervical spine to the right and to the left
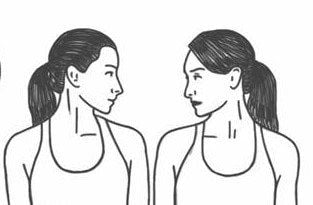
Note: Only practice turning the cervical spine, while the body remains in a comfortable, upright sitting position as described above in the preparation position.
5. Move your head and neck forward and backward
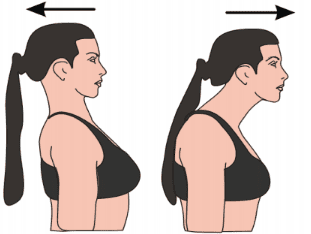
From the sitting position in the initial preparation position, the exerciser "brings" the head back to the maximum (in combination with inhalation), then "brings" the head forward to the maximum ( combined with exhalation), then continue to practice as above.
Note: Only exercise the head and neck, and keep the body in a comfortable, upright sitting position as described above in the preparation position.
6. Shoulder exercise exercise
6.1. Raise and lower the shoulder joint
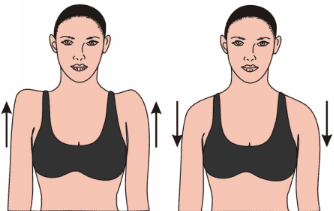
6.2. Move your shoulders forward and back
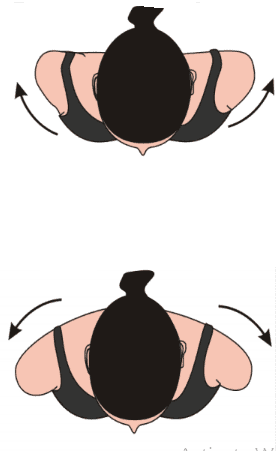
Note: Only move the shoulder joints on both sides, while the head, neck and torso remain in the upright sitting position, as described above in the initial preparation position
6.3. Rotate shoulder joint
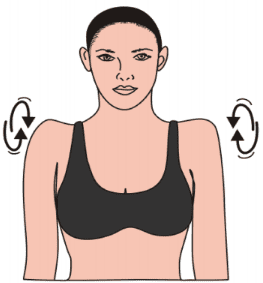
Note: Only move the shoulder joints on both sides, while the head, neck and torso remain in the sitting position
7. Some points to keep in mind while practicing and in daily life
Practitioners always sit in a comfortable, relaxed position, without straining the tendons. Do the movement slowly, gently until the end of the normal range of motion, if the pain is too much, then stop at that level of motion and gradually increase in the following days. Should practice sitting in front of the mirror to check and adjust the level of exercise properly and appropriately. Practice from one to two times a day, then gradually increase, starting with 5 times for each movement, then increase a few times each day until you reach 20 times for each movement (can practice up to 30 times if the practitioner still feels comfortable and at ease). Do not wear, carry heavy objects on your shoulders. Do not do sudden strong movements with the cervical spine and shoulders such as bending, twisting, bending. Limit excessive bowing movements, when traveling long distances (especially by car or motorbike), you should have a brace to support the cervical spine to prevent injury when the vehicle brakes, increases or decreases suddenly.
Please dial HOTLINE for more information or register for an appointment HERE. Download MyVinmec app to make appointments faster and to manage your bookings easily.


