This is an automatically translated article.
The article was written by Specialist Doctor II Pham Thi Tuyet Mai - Department of Obstetrics and Gynecology - Vinmec Hai Phong International General Hospital.The PAP test, also known as a cervical smear or screening test for precancerous lesions and cervical cancer, is the most common today. The test will look for and detect early abnormal changes in the cervix, which can lead to cancer. This test was discovered by Georgios Nikolaou PAPanikolaou - a prominent Greek doctor. Therefore, the name of this test is taken after him, which is still used effectively in medicine today.
1. Why is a Pap smear test needed?
Cervical cancer is a common type of cancer in women, occurring due to the malignant change of cells in the cervix.
There are two parts of the cervix that contain two different types of cells: The innermost part of the cervix, which leads from the uterus to the vagina, contains columnar cells responsible for mucus secretion. The outer part of the cervix, and protruding into the vagina, is home to squamous cells, which look like fish scales when viewed under a microscope. The area at the intersection of these two cell types is where most cervical cancers and precancerous cells form.
Cervical cancer screening plays a very important role in early diagnosis of cervical cancer. If cancer is diagnosed early, effective treatment is possible.
There are two tests that are often recommended for early cervical cancer diagnosis:
Pap smear : A screening method that can help detect abnormal and cancerous cells through the stool analysis. analysis of cell samples taken from the cervix. The human papillomavirus (HPV) test, which detects DNA from HPV to check for both the presence and strain of the virus. HPV is a virus that can lead to cervical cancer in some cases. There are more than 150 types of HPV, but only a few, such as types 16 and 19, can lead to cervical cancer. HPV can be passed from one person to another during vaginal, anal, or oral sex with skin-to-skin contact.
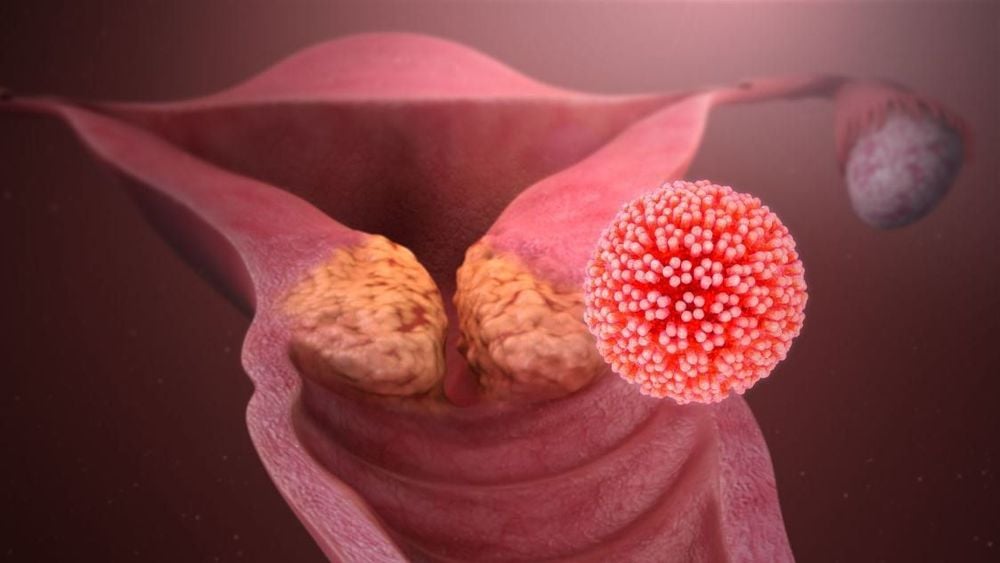
Virus HPV có thể gây bệnh ung thư cổ tử cung ở nữ giới
These test results can help determine if a person has cervical cancer or is at risk of developing cancer. These tests can help detect:
Precancerous cell changes; The presence of HPV ; Occurrence of cancer. Routine screening doesn't always include both tests at the same time, but a person can order both HPV and Pap smear testing at the same time.
According to the American Cancer Society (ACS), cervical cancer mortality has been significantly reduced by Pap smears.
2. Risk factors for developing cervical cancer
Not getting enough HPV vaccine ; Failure to periodically check and examine; HPV infection; Smoke; Having unprotected sex; Having many sexual partners; Have a chlamydia infection ; Weakened immune system, eg due to HIV Do not eat or eat less vegetables and fruits; Overweight; Using oral contraceptives for a long time; Use an IUD to prevent pregnancy; Pregnancy multiple times; The first full-term pregnancy under 18 years old; Are taking the hormone drug DES or have a mother who used it during pregnancy. Doctors also advise against douching, as this can increase the likelihood of bacterial vaginosis.
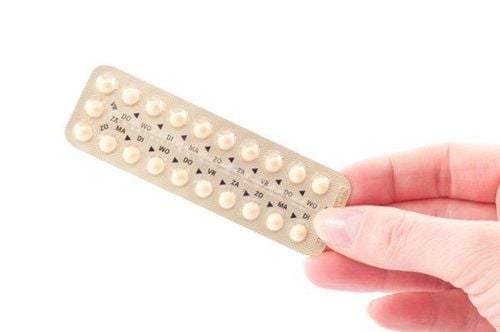
Sử dụng thuốc tránh thai trong thời gian dài có thể làm tăng nguy cơ phát triển ung thư cổ tử cung
3. When to do a Pap smear?
Recommendations for Pap smear frequency depend on several factors including:
Age; Medical history; Exposure to diethylstilbestrol (DES) in the womb; Immunocompromised status, HIV; Experts recommend that:
Women 21-29 years old should have a Pap test every 3 years. Women ages 30-65 should have a Pap test every 3 years or an HPV test every 5 years or a Pap and HPV co-test every 5 years. After age 65, most women will not need a Pap smear. However, each person's risk factors are different. People with previous abnormal test results and those with multiple sexual partners may need more frequent testing.
After a complete hysterectomy including removal of the uterus and cervix, there may be no need to continue to have Pap tests.
However, anyone who has had a hysterectomy due to cancerous or precancerous cells should continue to have regular checkups.
Every situation is different, so talk to your doctor about your risk factors and your need for cervical cancer screening.
4. Steps to take cervical smear
4.1 Patient Preparation:
Collect sample in the second half of the menstrual cycle to avoid excessive blood contamination. Do not collect a cervical smear while you are menstruating. During the red light days, this test is still possible but does not guarantee accurate results. Instruct the patient not to douche, not to put any medication in the vagina, and not to have intercourse for 48 hours before sampling. Instruct the patient to lie in the obstetric position. Use a speculum without lubricant (can use physiological saline or warm water to lubricate the speculum), expose the cervix completely, so that the cervix can be seen most clearly.
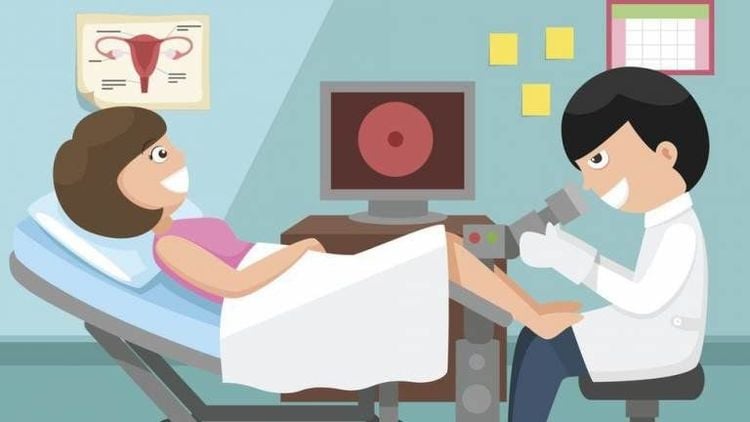
Bệnh nhân được nằm tư thế sản khoa
The test card must contain the following minimum information:
Full name Year of birth (or Age) PARA Sampling date Sampling location: intracervical neck, ectopic neck, vaginal apex , vagina Full name of sampler Clinical information: date of last menstrual period, diagnosis, previous treatment. Specimen slide and vial:
Use a pencil to write on the frosted glass part of the slide the patient's name, patient's name, and patient number. If two smears are used for cervical smears, clear symbols for the ectopic neck (C: ectocervix) and the endocervical smear (E: endocervix) are required. The slide container must also be clearly marked with the patient's name.
Equipment needed:
Plastic or wooden Spatula vaginal speculum Cell brush (Cytobrush®) Fixing solution (fixation spray or ethyl alcohol solution bottle 95 Clean slide (with glass part) translucent at one end of the slide) Black pencil (lab grade) Cell sheet 4.2 Sampling steps Before sampling, write on the slide the patient's first and last name and specimen collection site. do not lubricate (can use physiological saline or warm water to lubricate the speculum). Observe the cervix, pay attention to the transition zone and abnormal areas in the cervix. Samples must be obtained from the transition zone and the abnormal areas (if visible).The transition zone is the area between the two limits: the outer limit (the ectopic neck) and the inner limit (where the columnar epithelium meets the cervical epithelium)
Step 1: Clean the cervix (only done when there is too much secretion in the cervix): Use a cotton swab to gently wipe the cervix, wipe away the mucus in the cervical opening. bow. Note not Wash the cervix with physiological saline.
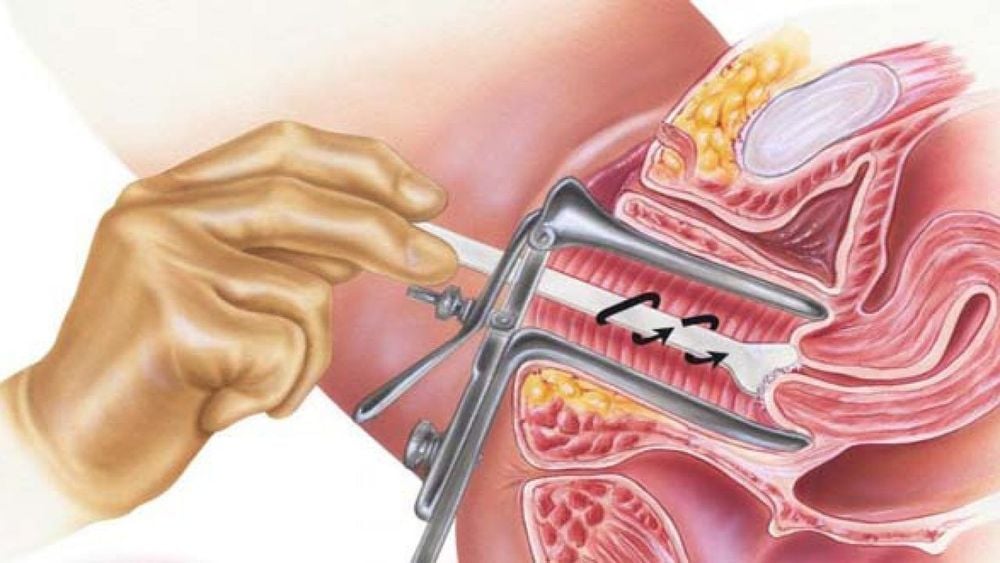
Thực hiện lấy phết tế bào cổ tử cung để làm xét nghiệm
Step 2: Sampling
* If a Chlamydia test is required, a Chlamydia sample should be obtained prior to the Pap smear.
* Routine cervical smear
1-slide sampling technique (using 1 spatula and 1 cytobrush (Cytobrush®)): After clearly observing the cervix, use a large-headed spatula, scratch the entire cycle ectopic cervix (rotation of the spatula 360o). Start scratching at position 9g, rotate 1 turn clockwise, end at position 9g (can be rotated counterclockwise, from position 3g to 3g). In this way, the cell will lie above the horizontal plane when the spatula is withdrawn. Pull out the spatula. Do not spread the cells on the slide. Hold the spatula in 1 hand, with the other hand continue to take a sample of the neck in the cervix. Or you can put the spatula on the slide, bring the part with the specimen up, and then continue to take the intracervical sample.
Insert the cell brush into the endocervical neck until all the bristles are in full contact with the cervix. Do not insert the brush too deeply, only insert the length of the brush (1.5 - 2 cm) Rotate the brush 1⁄4 - 1⁄2 turns, in one direction. Note do not rotate > 1⁄2 turns. Do not rotate too many times because it can cause cervical bleeding. Pull out the cell brush.
Quickly smear the spatula on the half slide next to the translucent glass. Spread in only 1 direction. Spread evenly, so that there is only 1 layer of cells. Smooth out areas of clumped cells. Avoid handling too hard to damage cells. Quickly spread the cell on the brush onto the half slide, the side opposite the frosted glass part. Spread the cells by rotating the brush ring the length of the slide, gently rotating and gently pressing the brush. Then spread the second coat over the first. Sample fixation immediately.
2. Single slide sampling technique (using 1 spatula): After clearly observing the cervix, use the short end of the spatula to scratch the entire circumference of the ectopic neck (rotate the spatula 360o). Start scratching at position 9g, rotate 1 turn clockwise, end at position 9g (can be rotated counterclockwise, from position 3g to 3g). Pull out the spatula. Do not spread the cells on the slide.
Use the long end of the spatula to scrape the entire circumference of the neck inside the cervix (rotate the spatula 360o). Start scratching at the 9g position, rotate 1 turn clockwise, ending at the 9g position.
Quickly spread the cells on the short spatula onto the half slide next to the frosted section. Spread in only 1 direction. Spread evenly, so that there is only 1 layer of cells.
- Quickly spread the cells on the long end of the spatula onto the half slide opposite the frosted section. Spread in only 1 direction. Spread evenly, so that there is only 1 layer of cells. Sample fixation immediately.

Kỹ thuật phết cổ tử cung thường quy
4. 2 slide sampling technique (using 1 spatula): After clearly observing the cervix, scrape the entire circumference of the ectopic neck with the short end of the spatula (rotate the spatula 360o). Start scratching at the 9g position, rotate 1 turn clockwise, ending at the 9g position. Pull out the spatula.
Quickly smear the cells on the short spatula onto slide (1) (strip with “C”). Spread in only 1 direction. Spread evenly, so that there is only 1 layer of cells. Sample fixation immediately. Use the long end of the spatula to scrape the entire circumference of the neck inside the cervix (rotate the spatula 360o). Start scratching at the 9g position, rotate 1 turn clockwise, ending at the 9g position. Quickly smear cells on the long end of the spatula onto slide (2) (strip with “E”). Spread in only 1 direction. Spread evenly, so that there is only 1 layer of cells. Sample fixation immediately.
5. Sampling technique with only the cell brush (Cervix Brush®) (1 slide): Insert the cell brush into the cervix, with the long hair in the middle in the cervical canal, the short hair part. externally against the ectopic neck of the cervix. Rotate the brush 2-3 times around the surface of the cervix, in both directions. Pull out the broom. Spread the cells on the slide like a paint job. Brush both sides of the brush. Apply the 2nd layer over the first layer. Sample fixation immediately.
* ThinPrep® Pap test
Using spatula and cell brush:
Take a sample of the ectopic neck with a spatula as described above. Dip the spatula into the vial of the cell fixation solution (Preserv Cyt®: is a type of cell immobilization solution, consisting mainly of methanol, which can be stored for up to 3 weeks at 4oC - 37oC). Stir vigorously the spatula in the jar 10 times. Take out the spatula. Collect an intracervical sample with a cytological brush as described above. Dip the brush into the Preserv Cyt® vial. While rotating, while pressing the brush against the wall of the jar, do 10 times. Then twist the brush vigorously to loosen the cells further. Take out the brush. Close the lid of the jar carefully.

Kỹ thuật phết cổ tử cung nhúng dịch (ThinPrep® Pap test)
Using the Cervix Brush®:
Insert the brush into the cervix, with the middle long bristles in the cervical canal. Rotate the brush 2-3 times around the surface of the cervix. Withdraw the brush and dip it into the vial of the cell fixative solution (Preserv Cyt®). Hit the bottom of the jar 10 times, pressing hard to separate the bristles. Finally, twist the brush vigorously to further slough off the cells. Take out the broom. Close the lid of the jar carefully. Remember to write the patient's name on the vial.
Step 3: Fix the sample (for routine cervical smear and routine vaginal smear)
Fix sample immediately (within 10-15 seconds) to avoid drying of cells. Place the slide in a vial containing 95% ethyl alcohol. Make sure that the portion of the specimen on the slide is completely in the fixative solution. Or spray fixing solution onto slide. Hold the spray bottle 20-30 cm away from the slide. Send the sample to the Cell room with the cell test sheet.
Vinmec International General Hospital is one of the hospitals that not only ensures professional quality with a team of leading medical doctors, modern equipment and technology, but also stands out for its examination and consultation services. comprehensive and professional medical consultation and treatment; civilized, polite, safe and sterile medical examination and treatment space. Customers when choosing to perform tests here can be completely assured of the accuracy of test results.
Customers can directly go to Vinmec Health system nationwide to visit or contact the hotline here for support.


